Version 4.4.0 - User Documentation
Prepare and Setup Jira Service Management Insight
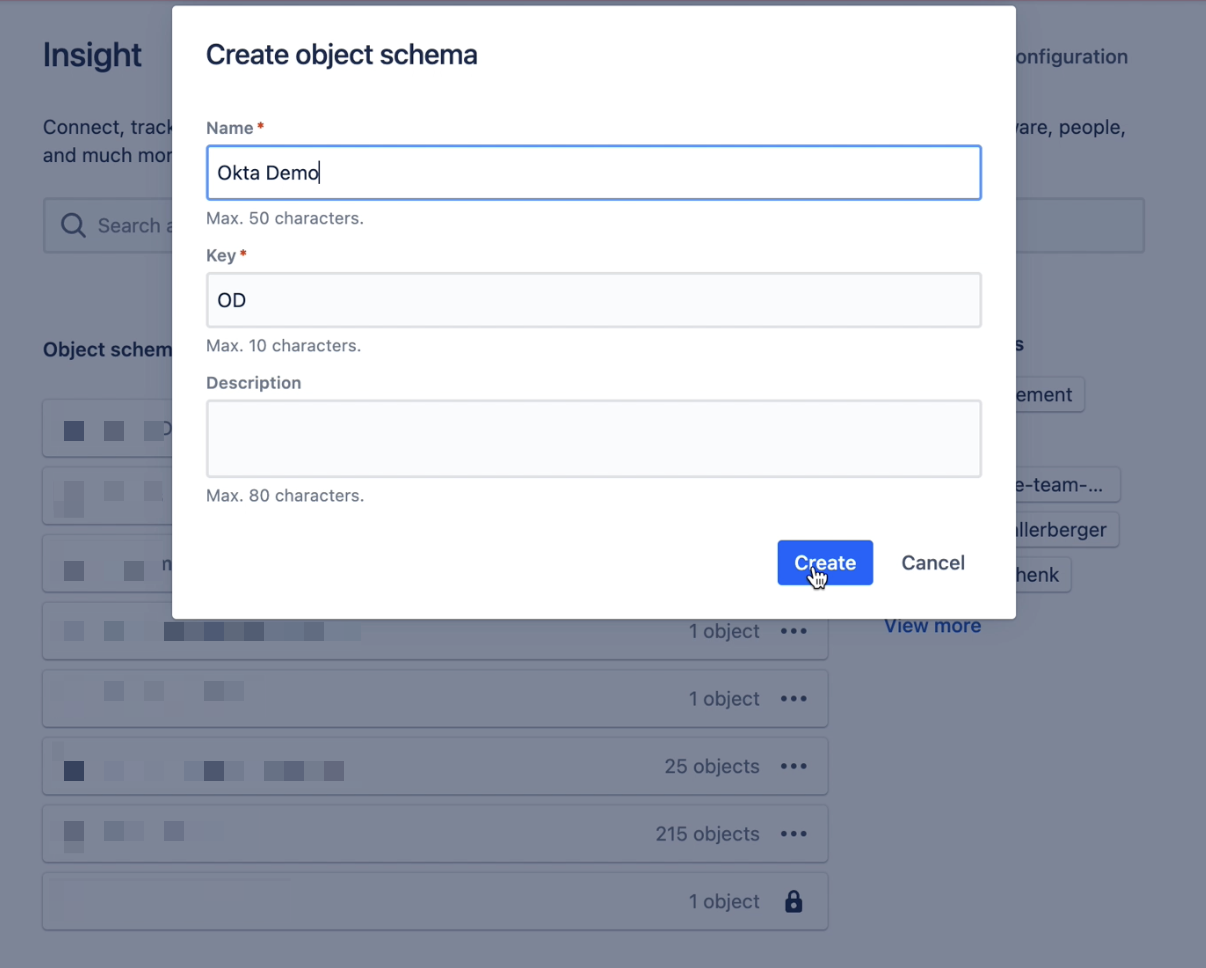
Create Insight Object Schema
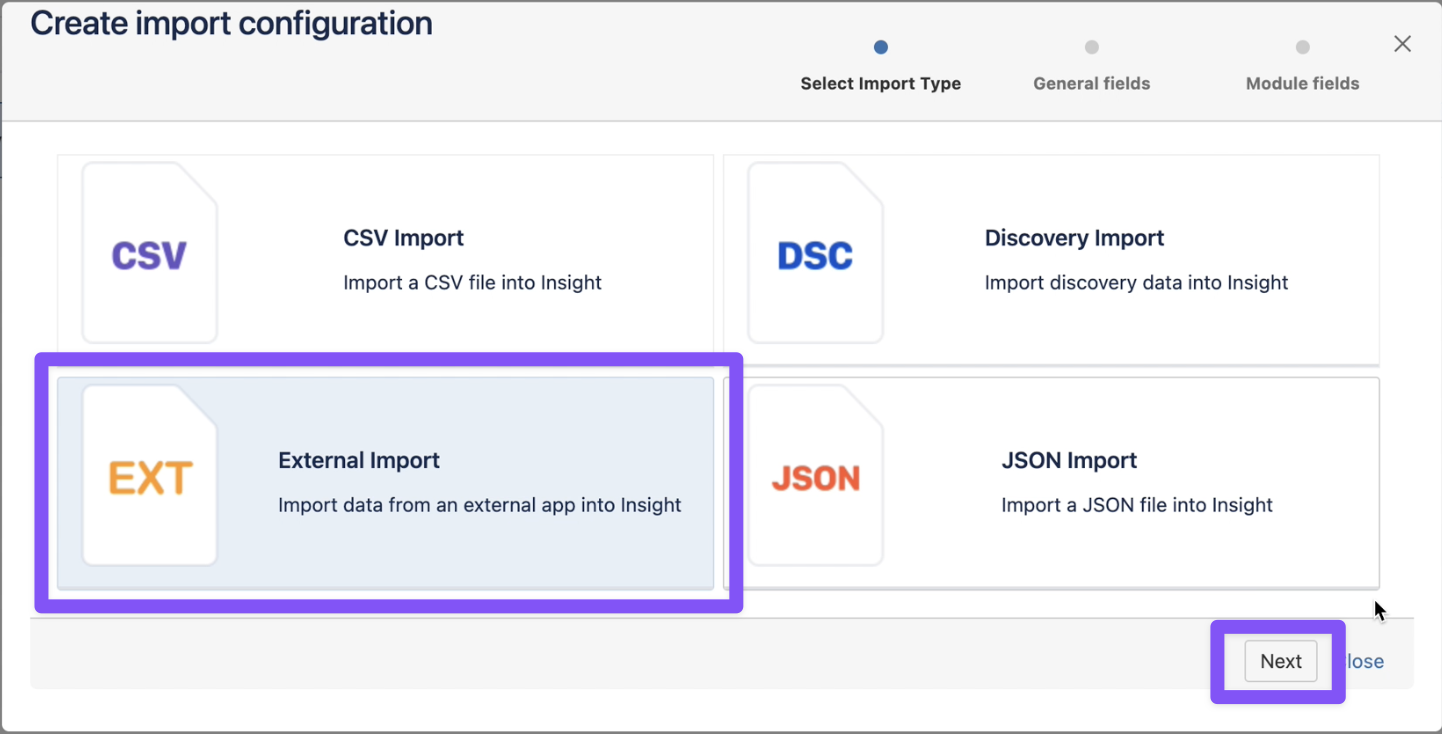
Create Import Configuration

Choose the External Import configuration and use the default values, choose a name and save it.
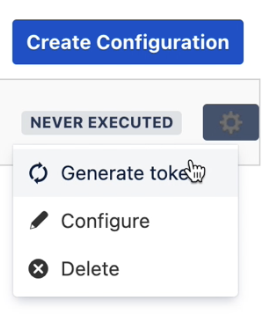
Generate Token
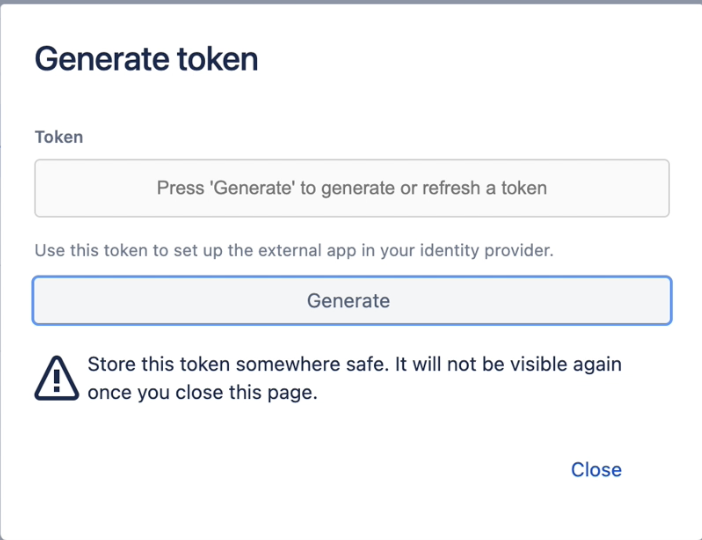
Generate the API token and store it somewhere safe.
Create Okta App OAuth2 Integration
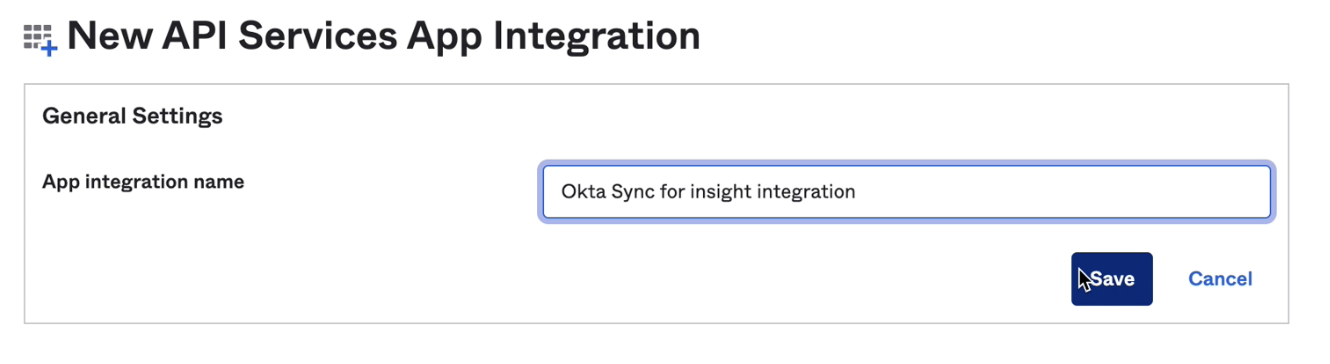
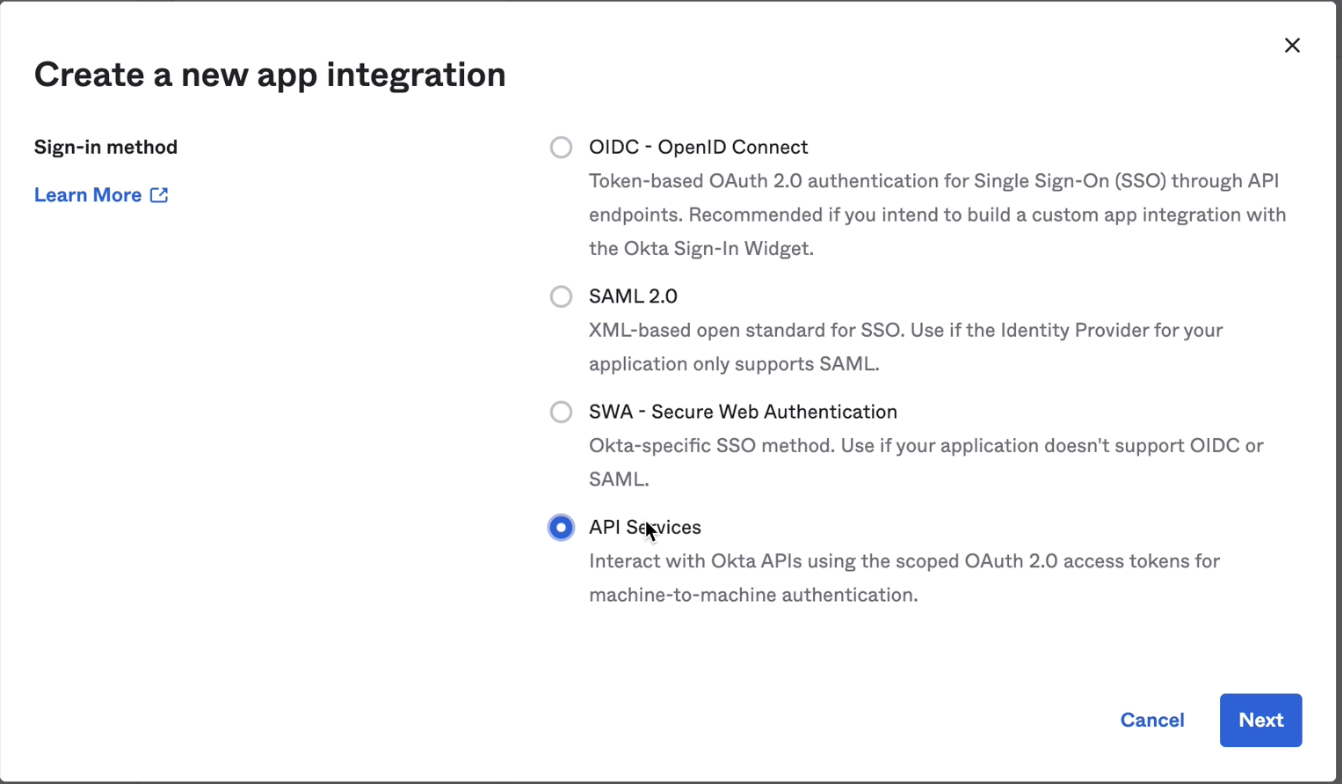
Create App Integration
Go to Applications -> Create App Integration -> Choose API Services
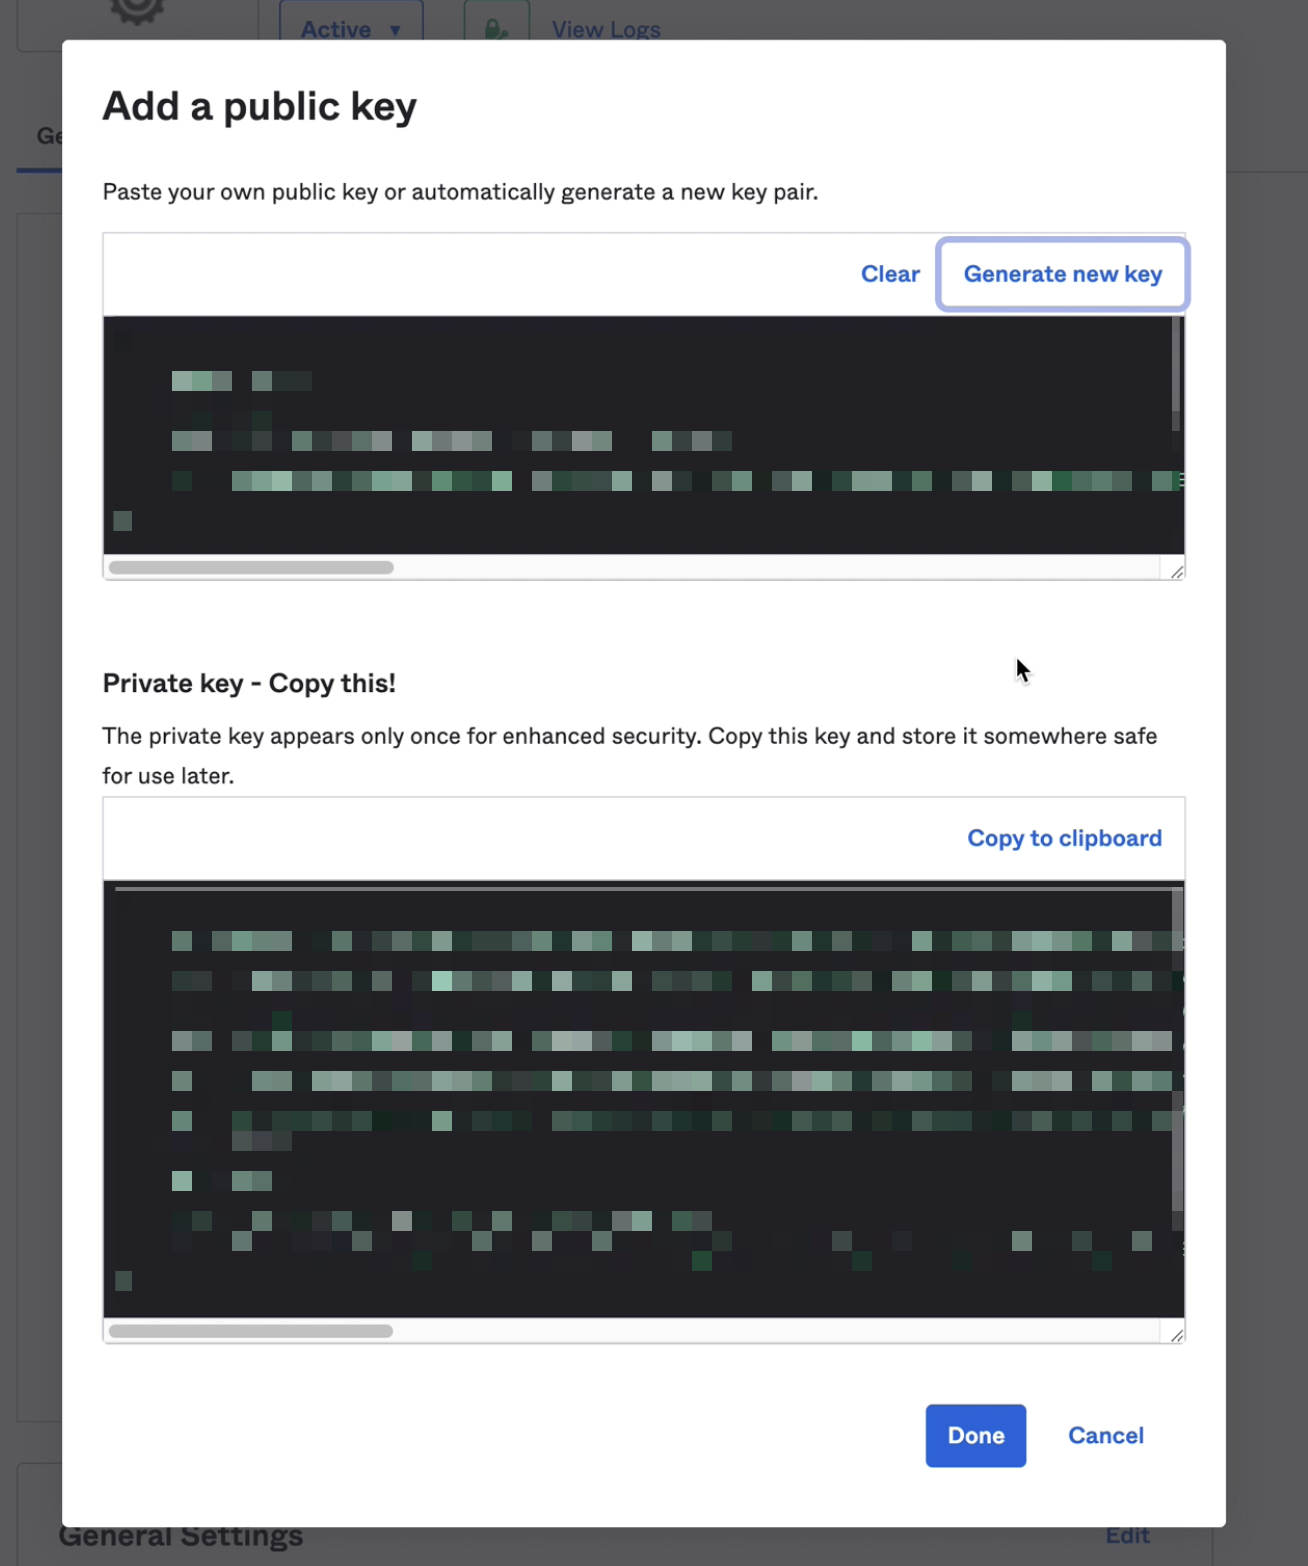
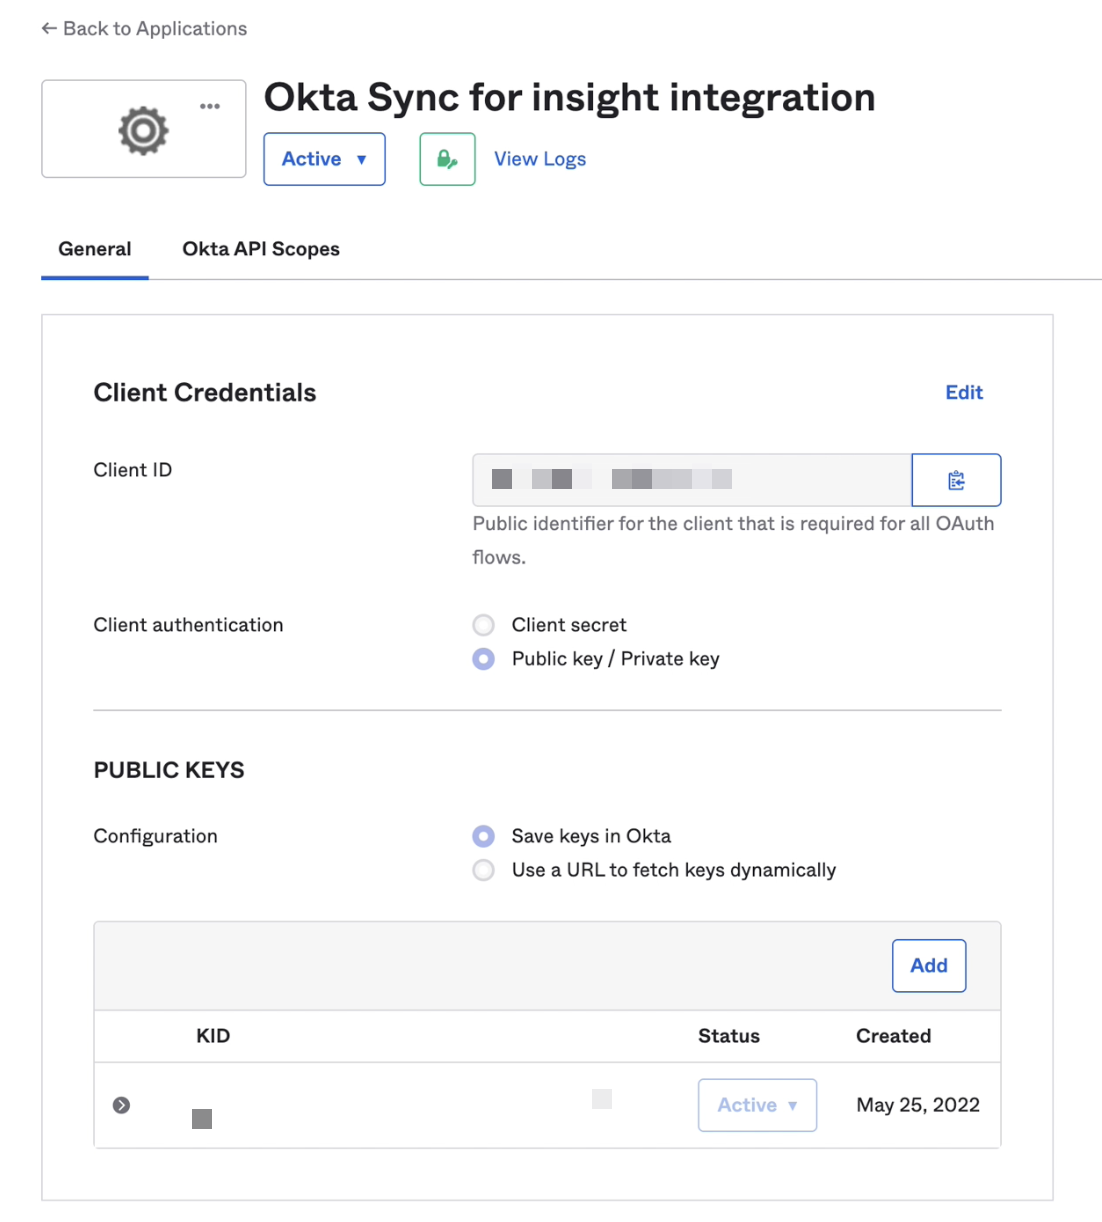
Change the Client authentication to "Public key / Private key" and add a key.
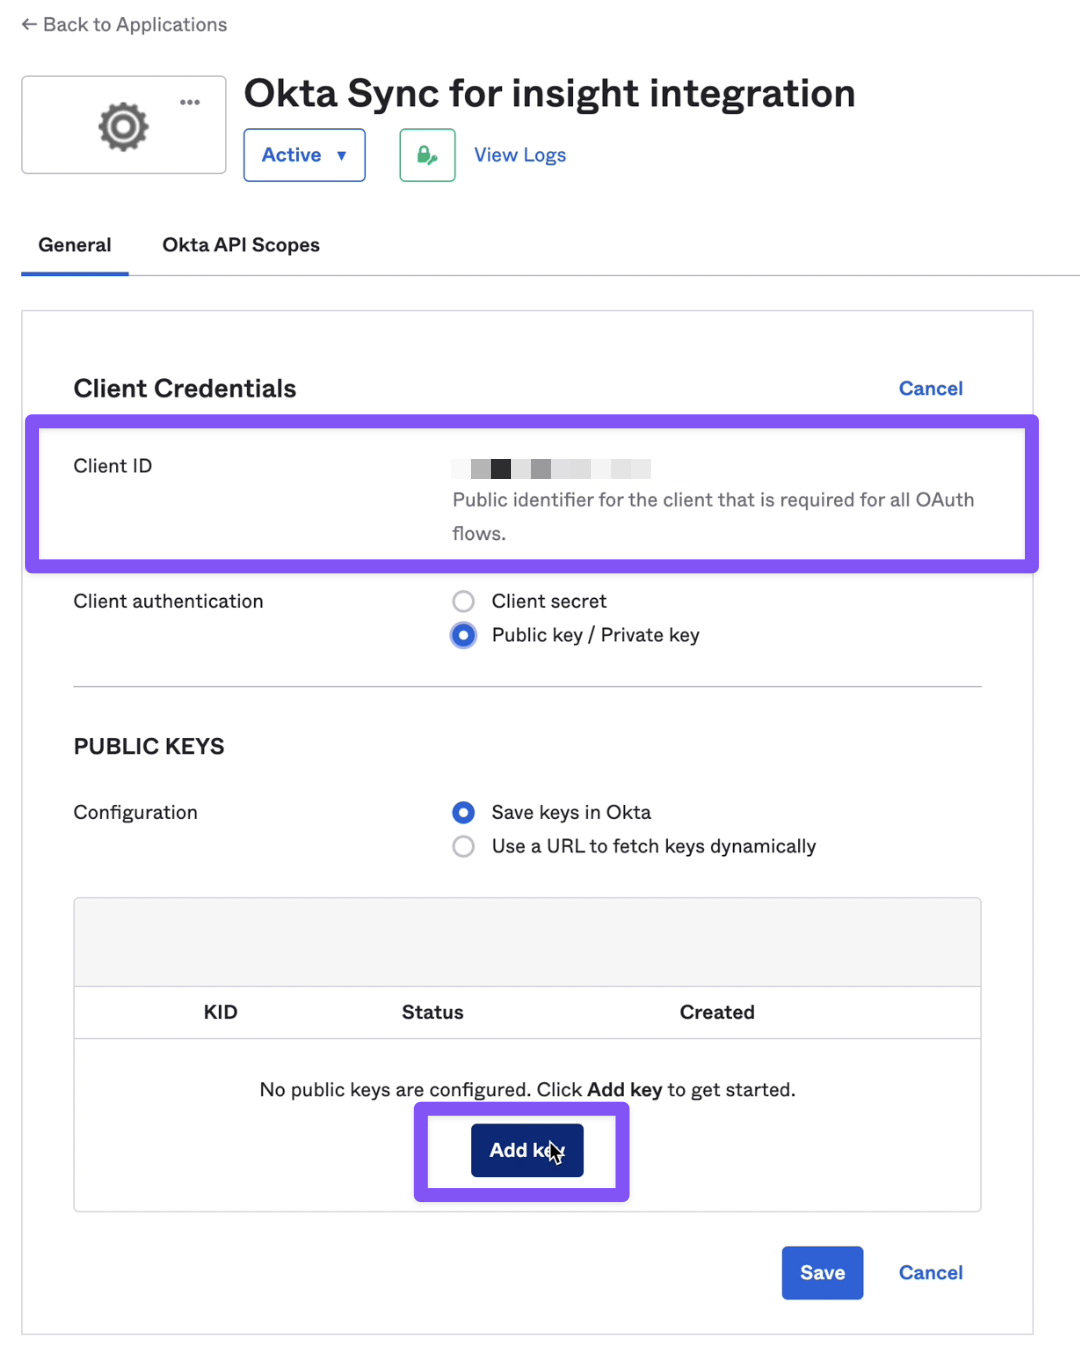
Copy the Client ID and the Private Key (JWK).
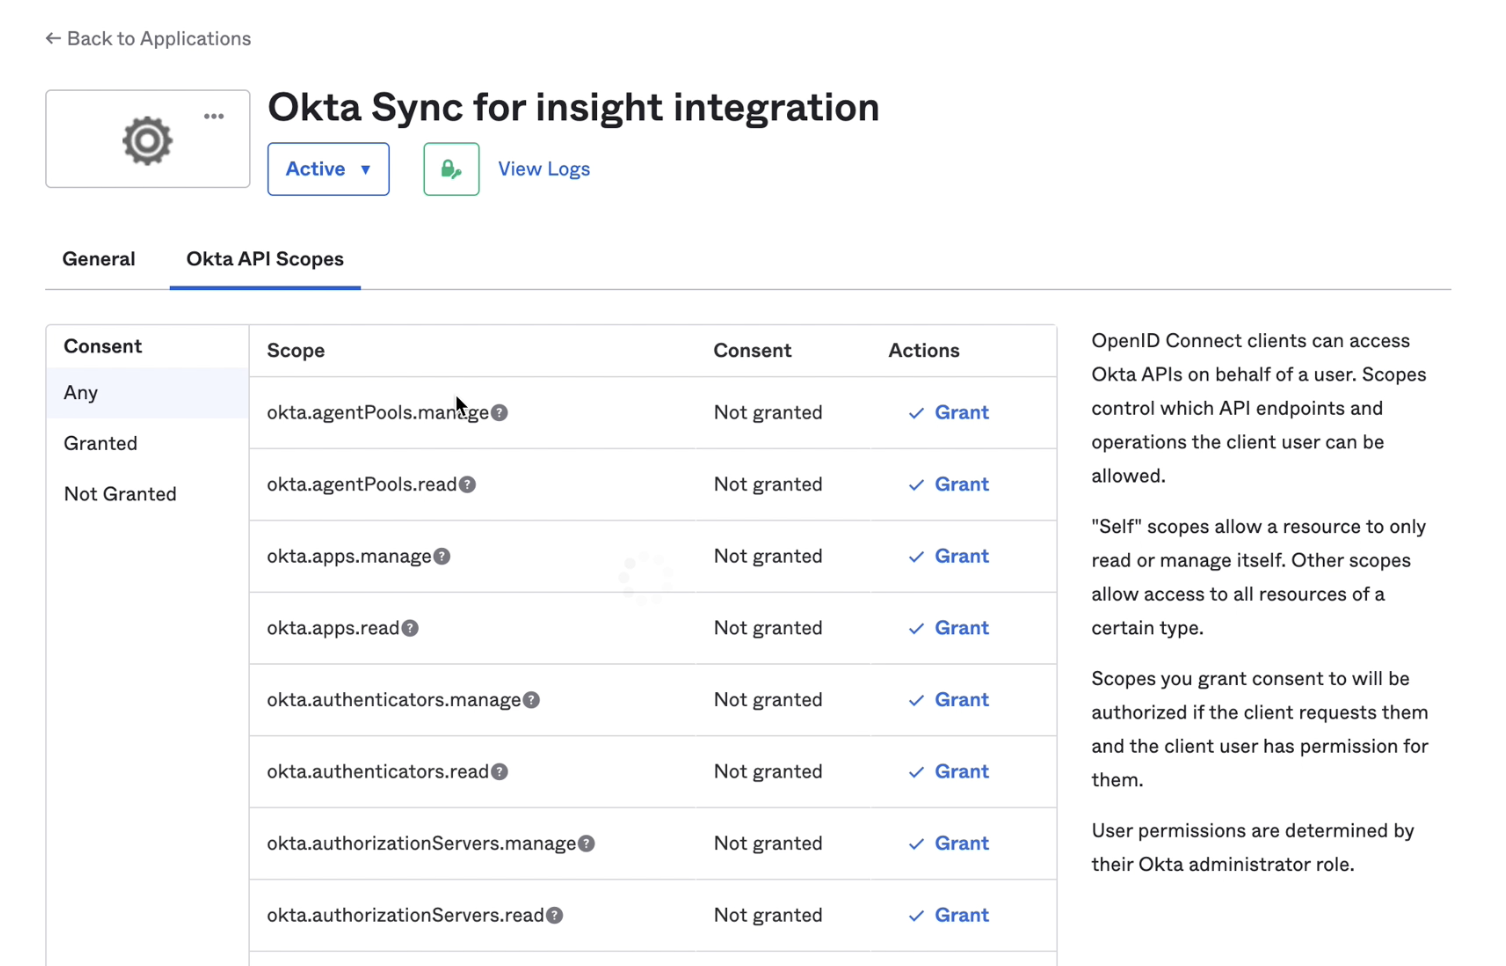
Grant Okta API Scopes
Scopes needed:
- okta.eventHooks.manage
- okta.groups.manage
- okta.users.manage (note: can be removed after the initial setup)
Configure Okta Sync for Insight
Add the following settings/credentials:
- Okta Client Organisation Url (e.g. https://company.okta.com/ - not the admin url!)
- Okta Client ID
- Okta Private Key (JWK) - the whole json
- Insights Import Token
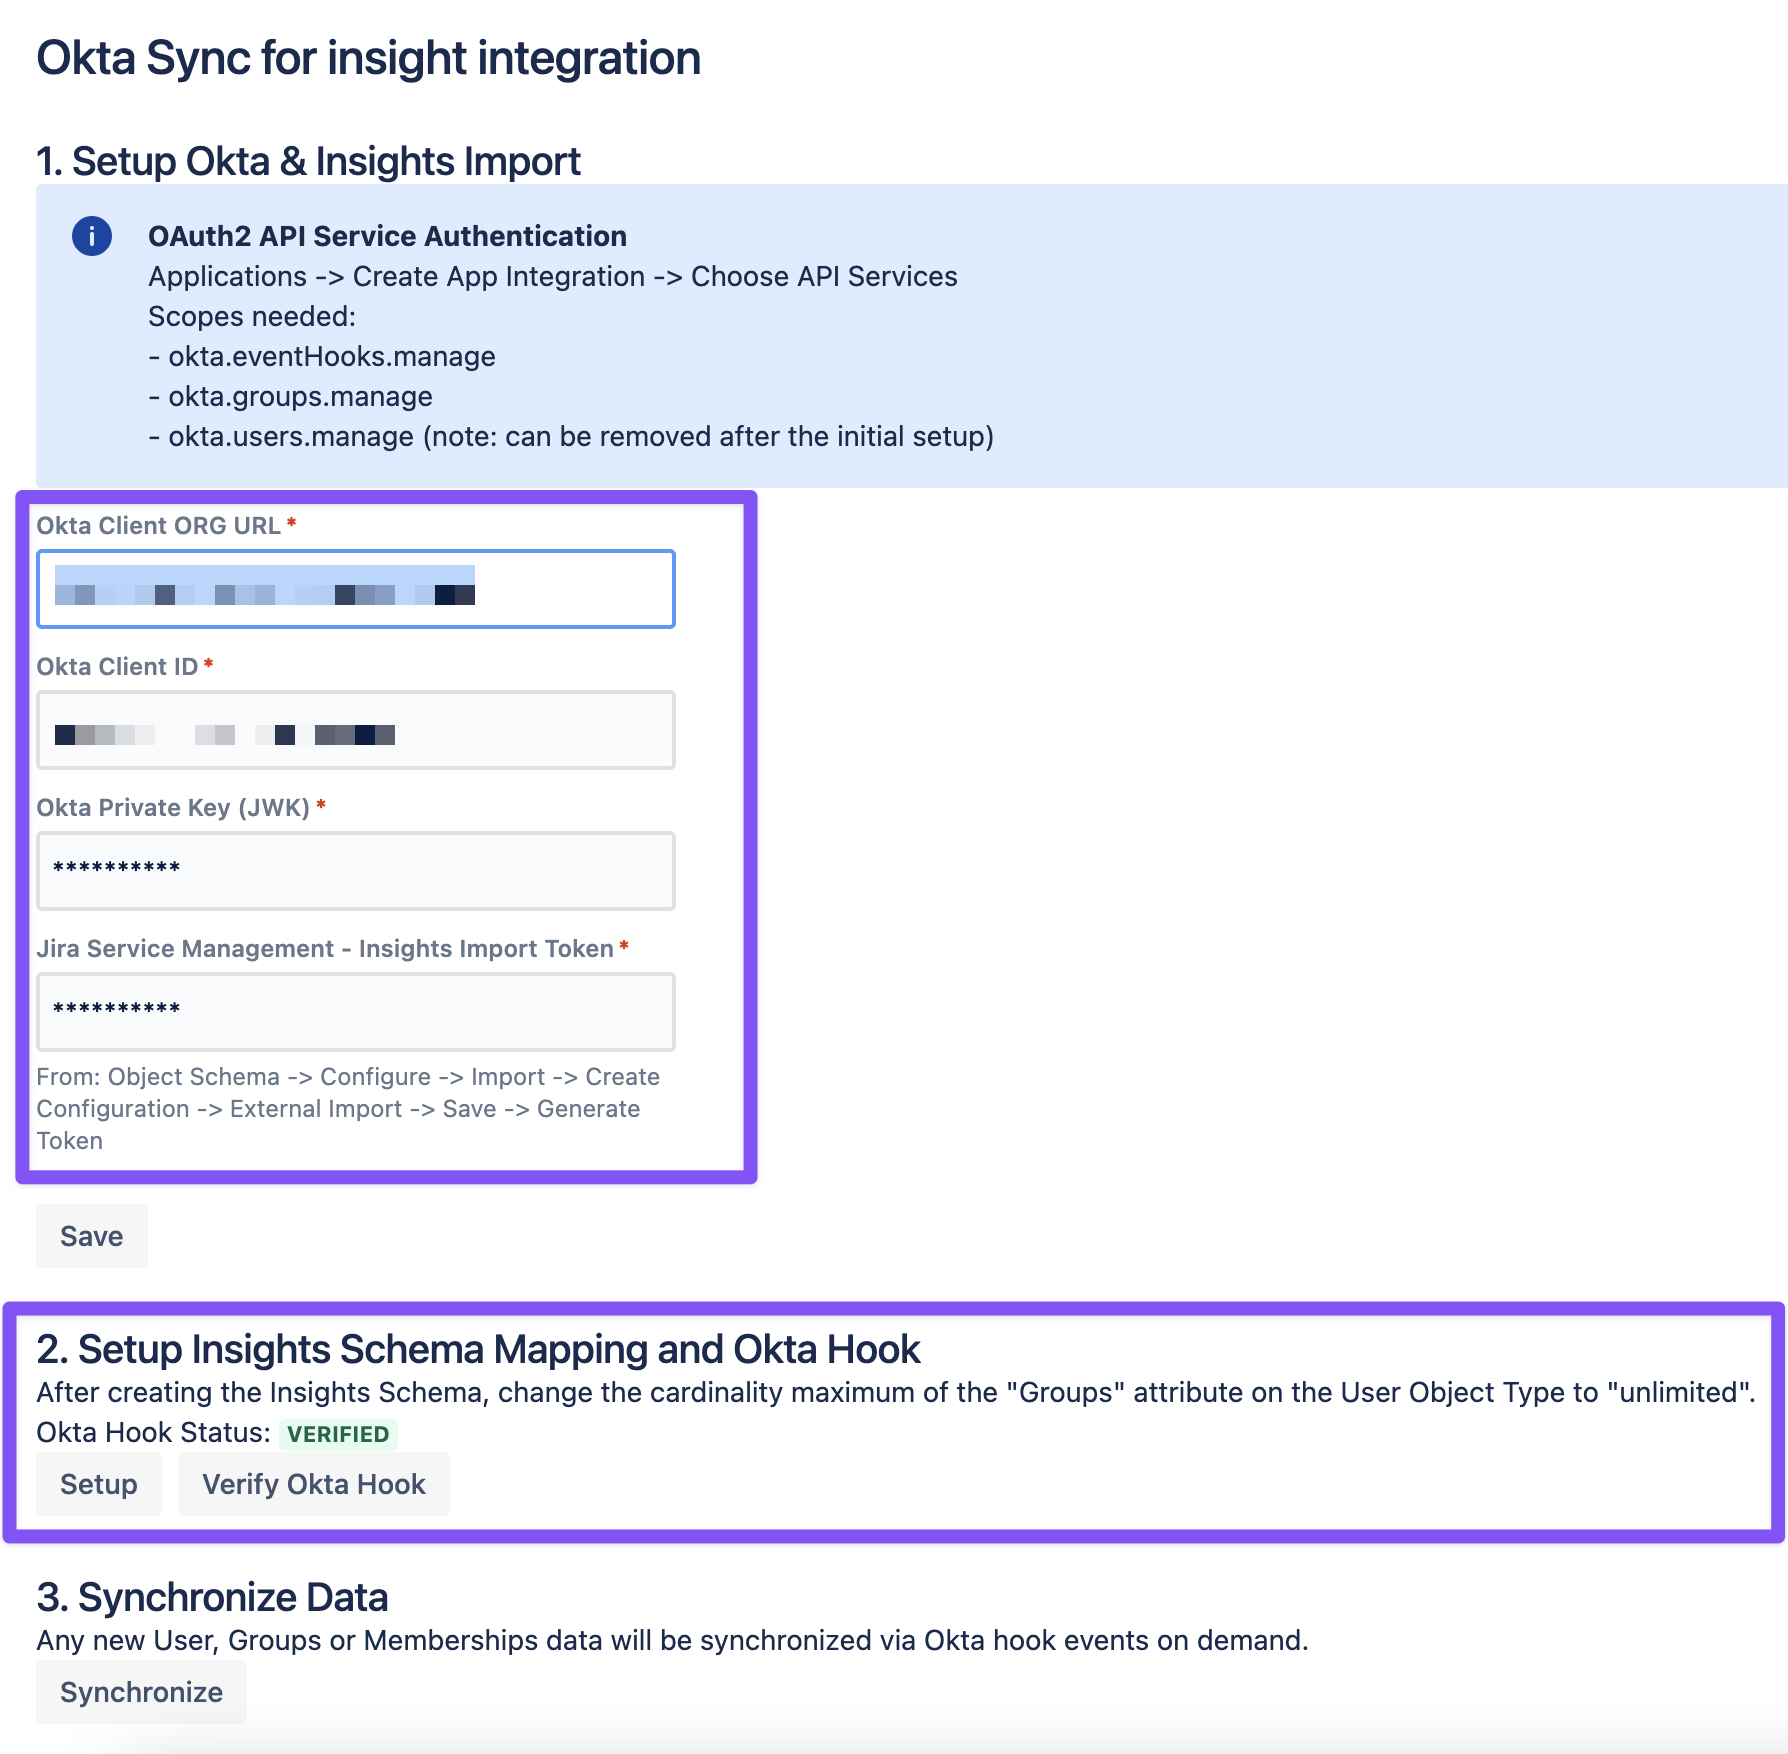
And press "Save", then you can initiate the setup process by pressing the "Setup" button.
This creates the object schema in Jira Service Management Insight and automatically creates the Okta Event Hook for the automatic synchronization of the users and groups.
After the setup process is finished in the background you can press "Verify Okta Hook", to check if everything is correctly configured.
Important: Don't synchronize the data yet.
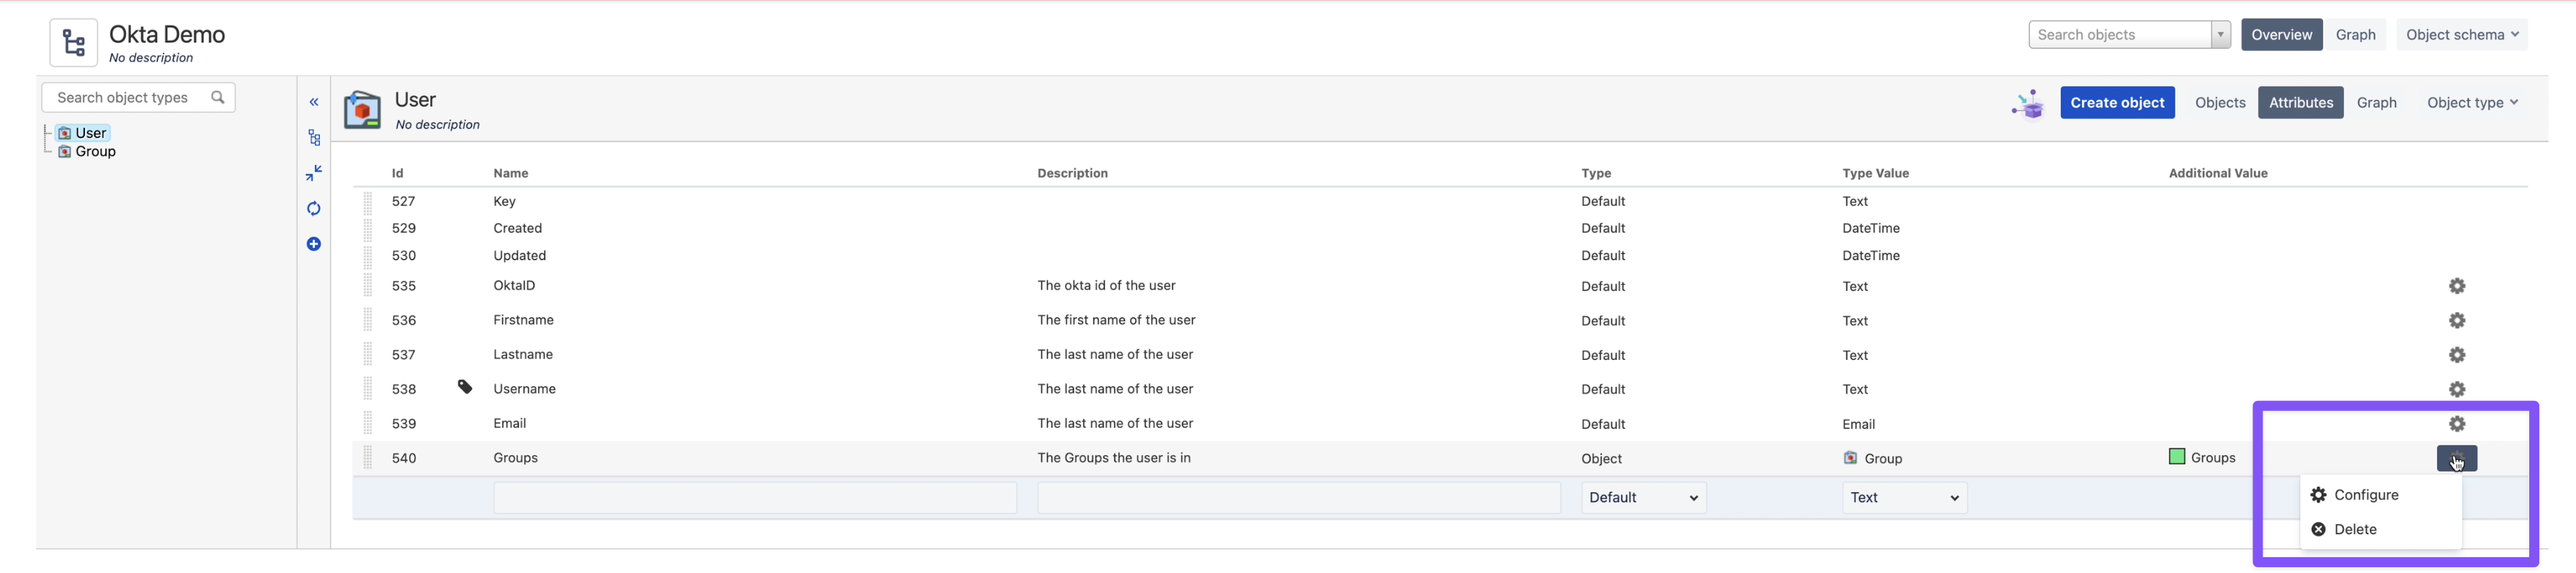
Last Preparations in Insight
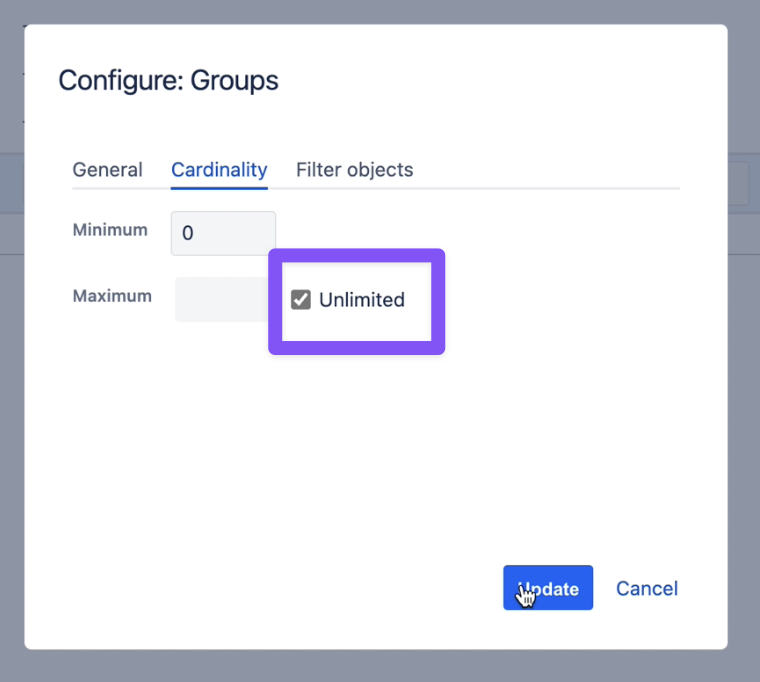
Go to your User Schema in Insight and change the cardinality maximum to 'unlimited'. Note: Unfortunately this can't be automated yet, due to restrictions in the Atlassian API.
Last Steps in Okta Sync for Insight
Now you can press "Synchronize". This will synchronize your users and groups initially, after that it will automatically sync them via the okta event hook.
And it will automatically update the schema in Insight according to the user/group profile fields of Okta, including the custom fields.
Note: no user or groups will be deleted in Insight, this has to be done manually if needed.
Prepare and Setup Jira Service Management Insight
Create Insight Object Schema
Create Import Configuration
Choose the External Import configuration and use the default values, choose a name and save it.
Generate Token
Generate the API token and store it somewhere safe.
Create Okta App OAuth2 Integration
Create App Integration
Go to Applications -> Create App Integration -> Choose API Services
Change the Client authentication to "Public key / Private key" and add a key.
Copy the Client ID and the Private Key (JWK).
Grant Okta API Scopes
Scopes needed:
- okta.eventHooks.manage (note: can be removed after the initial setup)
- okta.groups.manage
- okta.users.manage
Configure Okta Sync for Insight
Add the following settings/credentials:
- Okta Client Organisation Url (e.g. https://company.okta.com/ - not the admin url!)
- Okta Client ID
- Okta Private Key (JWK) - the whole json
- Insights Import Token
And press "Save", then you can initiate the setup process by pressing the "Setup" button.
This creates the object schema in Jira Service Management Insight and automatically creates the Okta Event Hook for the automatic synchronization of the users and groups.
After the setup process is finished in the background you can press "Verify Okta Hook", to check if everything is correctly configured.
Important: Don't synchronize the data yet.
Last Preparations in Insight
Go to your User Schema in Insight and change the cardinality maximum to 'unlimited'. Note: Unfortunately this can't be automated yet, due to restrictions in the Atlassian API.
Last Steps in Okta Sync for Insight
Now you can press "Synchronize". This will synchronize your users and groups initially, after that it will automatically sync them via the okta event hook.
And it will automatically update the schema in Insight according to the user/group profile fields of Okta, including the custom fields.
Note: no user or groups will be deleted in Insight, this has to be done manually if needed.